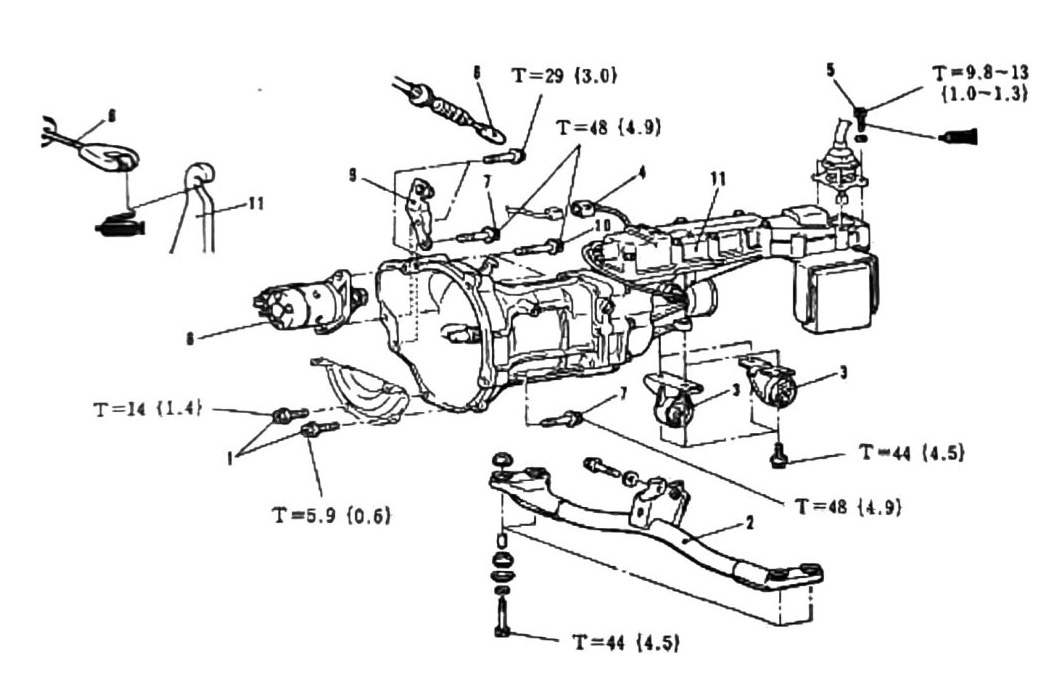
Transmission Removal
Manual transmission (5M/T) removal procedure — not applicable to our 3A/T automatic truck. The clutch cable disconnect step below is the tell: our truck has no clutch. See A/T Transmission Removal for the procedure that applies to our truck.
Preparation
Before removing the transmission, remove:
- Transmission Oil
- Rear Driveshaft
- Disconnect (-) Battery Cable
Component removal order
- Bell Housing Dust Shield. Place a transmission jack under the transmission.
- Remove the five (5) cross-member retaining bolts and remove the unit.
- Remove Rear Transmission Mount. Remove Front Driveshaft (4WD).
- Disconnect Backup Lamp Switch connector.
- Remove Shifter Assembly.
- Disconnect Clutch Cable.
- Remove Transmission lower mounting bolts.
- Remove Starter Motor.
- Remove Clutch Cable Bracket.
- Remove Transmission upper mounting bolts.
- Slide Transmission towards the rear of the vehicle and remove.
- Installation in reverse.
Note: Never reuse Transmission Oil.
Torque
| Torque callout | N·m (kgf·m) |
|---|---|
| T=29 (21 ft-lb) | (3.0) |
| T=48 (35 ft-lb) | (4.9) |
| T=9.8-13 (87-115 in-lb) | (1.0-1.3) |
| T=14 (124 in-lb) | (1.4) |
| T=5.9 (52 in-lb) | (0.6) |
| T=44 (32 ft-lb) | (4.5) |
| T=48 (35 ft-lb) | (4.9) |
| T=44 (32 ft-lb) | (4.5) |
(verify printed p.174) — eight torque callouts are legible on the source diagram, but the leader lines tying them to specific numbered steps/bolts did not survive OCR as text. Do not assume a specific bolt-to-torque pairing without checking the printed diagram.