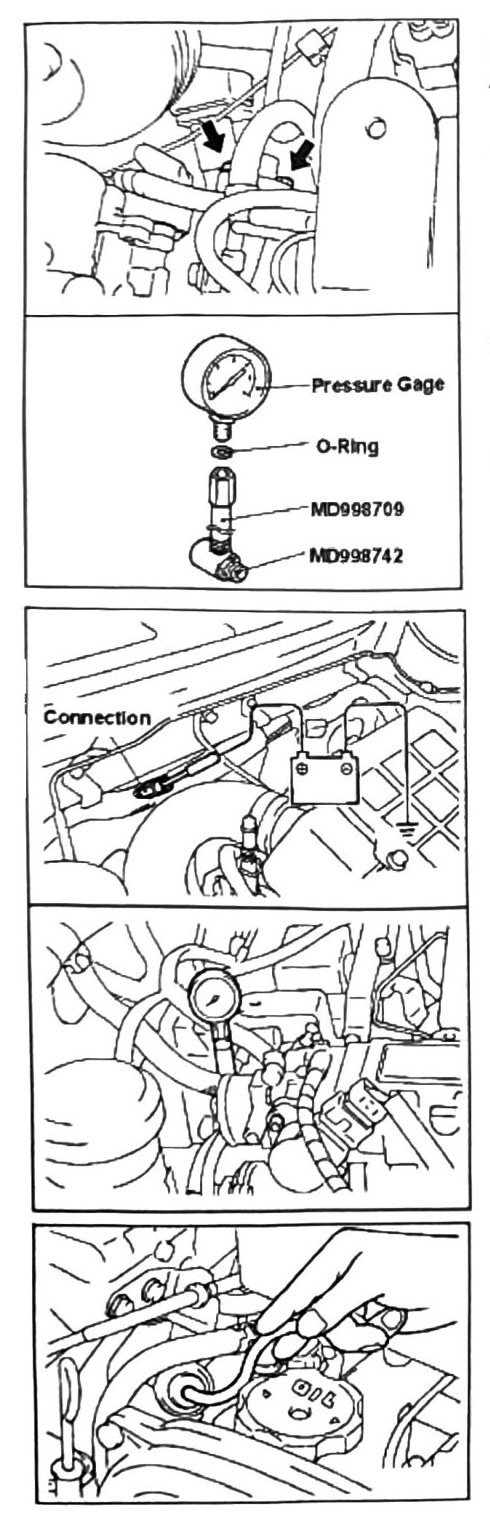
Fuel Line Pressure Test
Remove the intercooler on DOHC models, or the air cleaner assembly on SOHC vehicles, before starting.
Procedure
- Disconnect the fuel high-pressure (inlet) hose.
- Assemble the fuel pressure test gauge from the required components: pressure gauge, O-ring, hose adapters MD998709 and MD998742 (see Tools).
- Attach the fuel pressure test gauge in line and reconnect the inlet pressure hose.
- Use a jumper lead from a positive (+) battery source to the fuel pump circuit connector (most connectors are located on the firewall).
- Engage the circuit and test line pressure.
- Pressure range: 189 kPa (1.9 kgf/cm²; 27 psi)
- Limit: 245-265 kPa (2.5-2.7 kgf/cm²; 36-38 psi)
- Remove the gauge and reattach components.
Note: for fuel pressure below 180 kPa (26 psi), replace the fuel pump — see Fuel Pump-Filter-Tank System for pump removal. See Fuel Injector System for fuel rail components.
(verify printed p.136) — this page states three closely-spaced but distinct pressure figures that may or may not all be intentional: this page’s own “180 kPa” (pump-replacement threshold) and “189 kPa” (test range), plus Data & Specifications (printed p.121) states 186 kPa for the same “vacuum hose connected” condition. All three are clearly printed digits (not OCR line-noise), but they don’t agree with each other closely enough to be simple restatements. Do not use any of 180/186/189 kPa as the confirmed spec without checking a clean scan of both p.121 and p.136. The “245-265 kPa” limit figure is consistent between both pages and not in question.