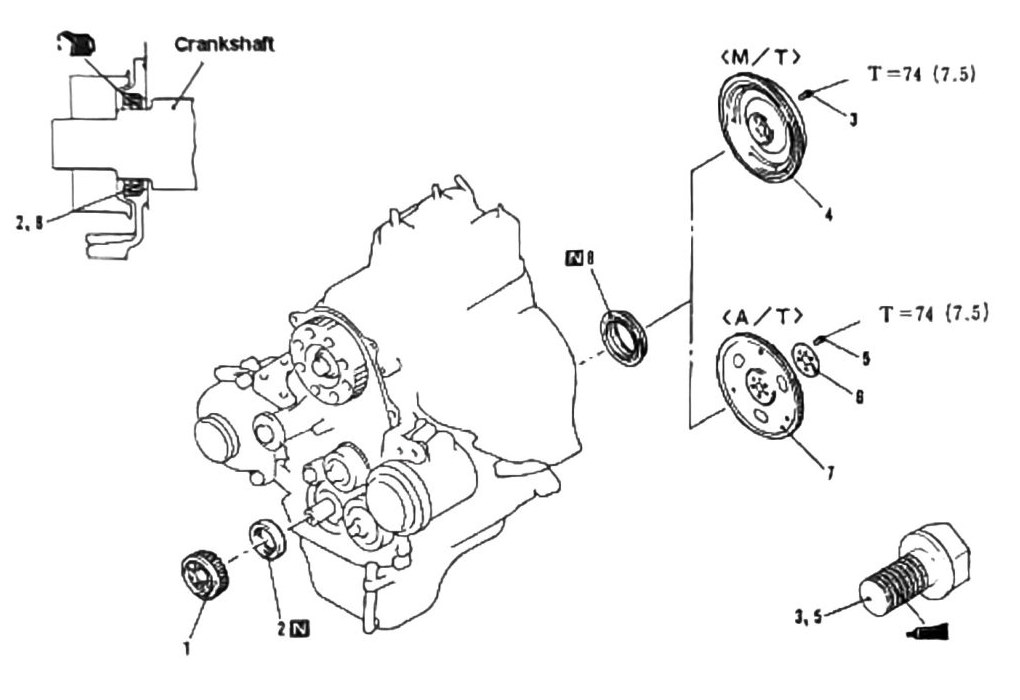
Crankshaft Oil Seal Replacement (SOHC & DOHC)
This procedure covers both engines and both M/T and A/T variants; steps differ where the flywheel (M/T) or flexplate/adapter plate (A/T) attach.
Note: remove the following as instructed in their related sections first:
- Clutch pressure plate assembly
- Timing belt assembly (Section 16 or 17)
Removal order
- Crankshaft sprocket
- Crankshaft front oil seal
- Flywheel attachment bolts (M/T)
- Flywheel (M/T)
- (verify printed p.57) — item 5 is illegible in the scan (OCR captured only a fragment, “5. T”); likely the A/T equivalent step (e.g. torque converter or drive plate related), but the exact wording could not be recovered
- Adapter plate (A/T)
- Flexplate (A/T)
- Crankshaft rear oil seal
- Install in reverse order
Note: apply thread lock sealant to items 3 and 5.
Note: coat all moving parts noted above with SAE 30W engine oil.
Torque values
| Fastener | Torque |
|---|---|
| Flywheel attachment bolts (M/T) | 74 N·m (7.5 kgf·m; 55 ft-lb) |
Seal installation
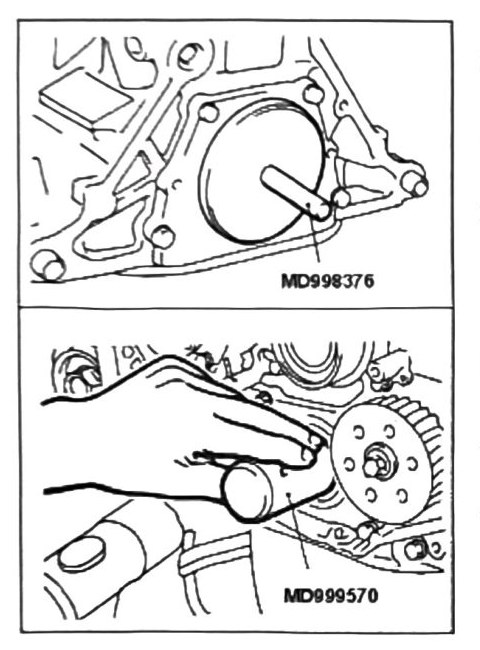
Rear seal
- Coat the new seal with SAE 30W engine oil before installation.
- Use seal driver MD998376 for proper installation.
Front seal
- Coat the new seal with SAE 30W engine oil before installation.
- Use seal driver MD999570 for proper installation.
(verify printed p.23 vs p.58) — the Section 9 tools table lists a different part number, MB991395, for the front crankshaft oil seal tool. This page’s explicit callout of MD999570 is treated as authoritative here since it’s stated directly next to the installation step, but confirm against the printed page — see the flag already raised in Section 9.