Oil Pump, Oil Pan & Front Case
Applies to all engine variants (SOHC and DOHC) — the manual heads this section “Oil Pump Replacement: ALL.”
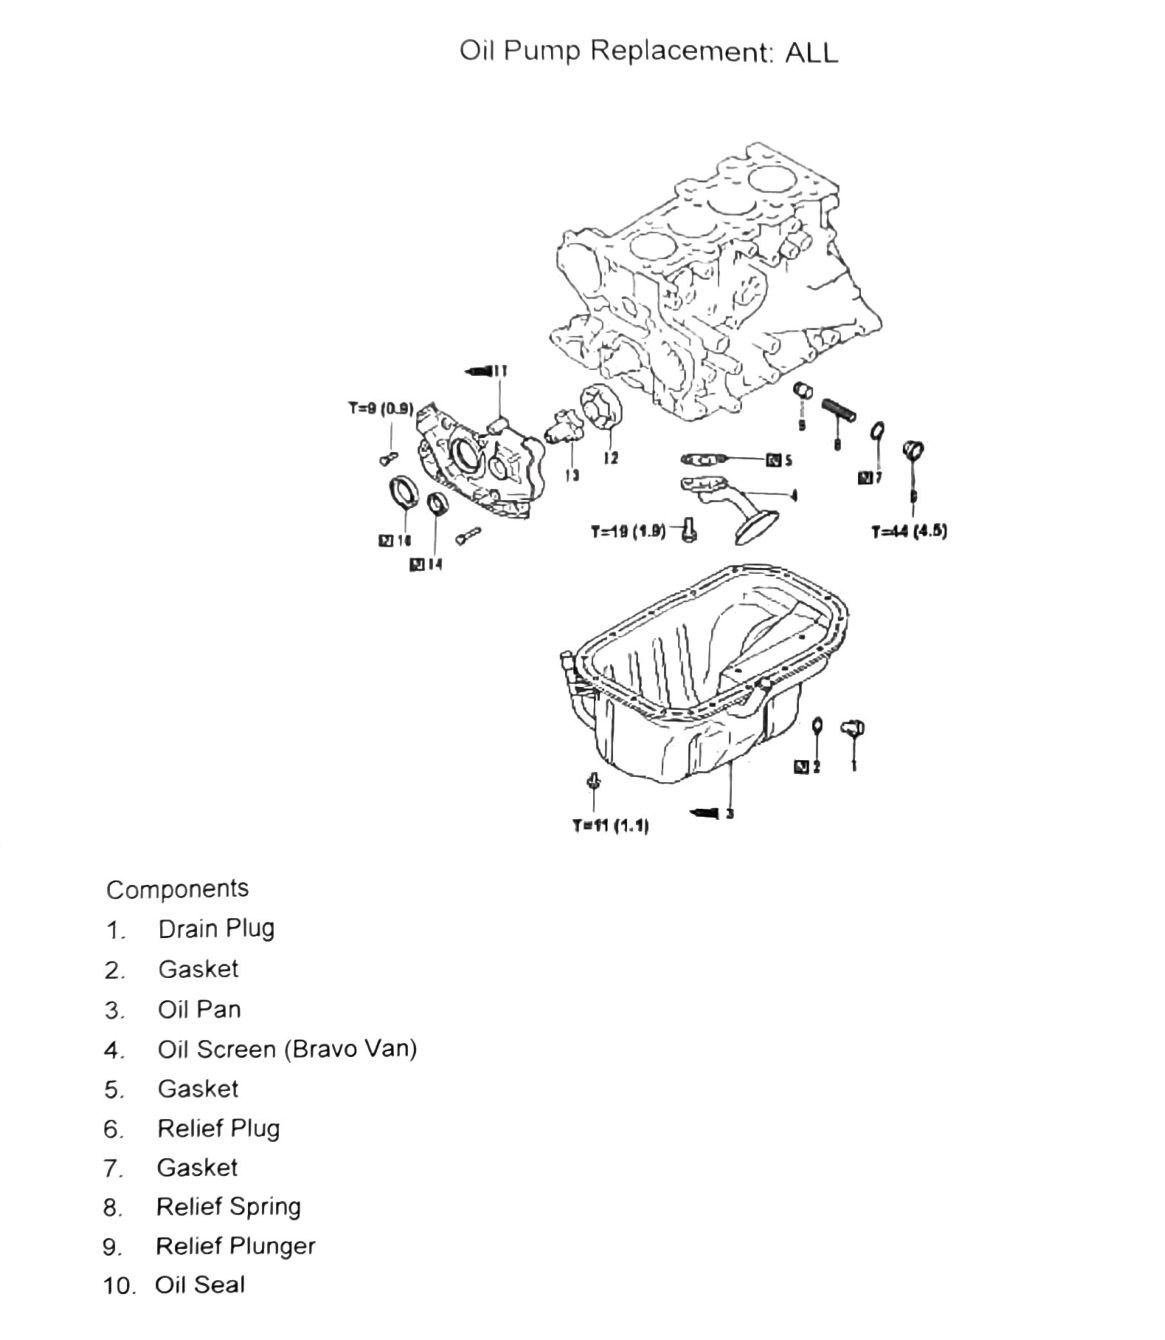
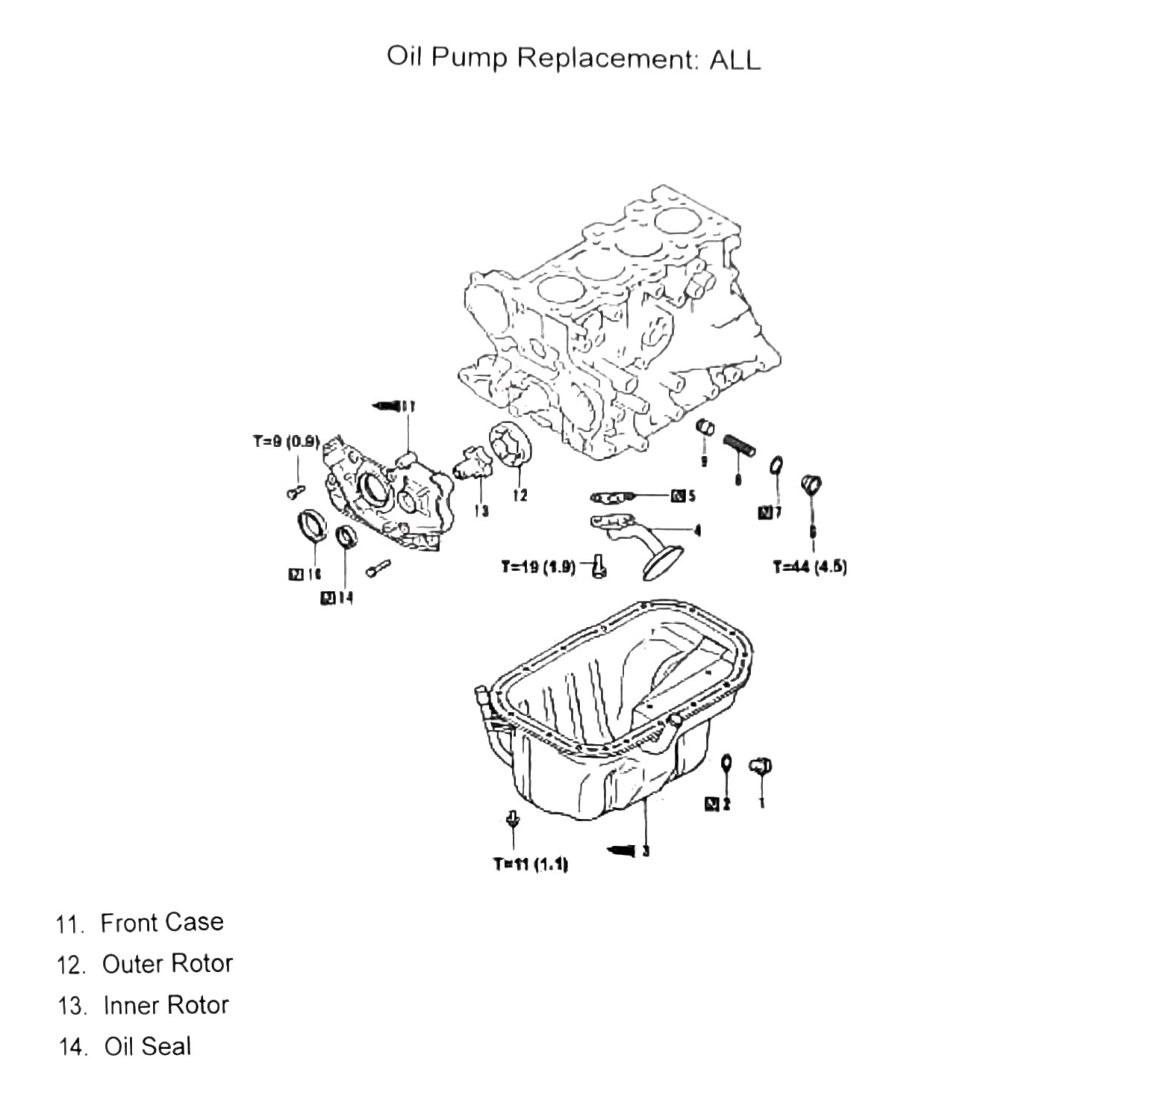
Component removal order
- Drain plug
- Gasket
- Oil pan
- Oil screen — (Bravo Van) — see note below
- Gasket
- Relief plug
- Gasket
- Relief spring
- Relief plunger
- Oil seal
- Front case
- Outer rotor
- Inner rotor
- Oil seal
Note: Item 4, “Oil Screen,” is annotated “(Bravo Van)” in the source — this may indicate a component specific to the Bravo Van variant rather than the standard Pajero Mini/our truck’s configuration. (verify printed p.98) before assuming this part applies to a DOHC 4A30 truck.
Torque values (as scanned)
| Value as scanned |
|---|
| T=9 (0.9; 80 in-lb) |
| T=11 (1.1; 97 in-lb) |
| T=19 (1.9; 168 in-lb) |
| T=44 (4.5; 32 ft-lb) |
(verify printed p.98-99) — these four torque values are recovered from the exploded-view diagrams, but which fastener each applies to (oil pan bolts, front case bolts, drain plug, relief plug) could not be confidently mapped from the OCR. As a reasonableness check: drain plugs on comparable engines commonly run in the 30-45 N·m range, so T=44 (4.5 kgf·m; 32 ft-lb) is plausibly the drain plug — but this is an inference, not a confirmed reading. Do not assign these torques to specific fasteners without checking a clean scan or the parts diagram directly.
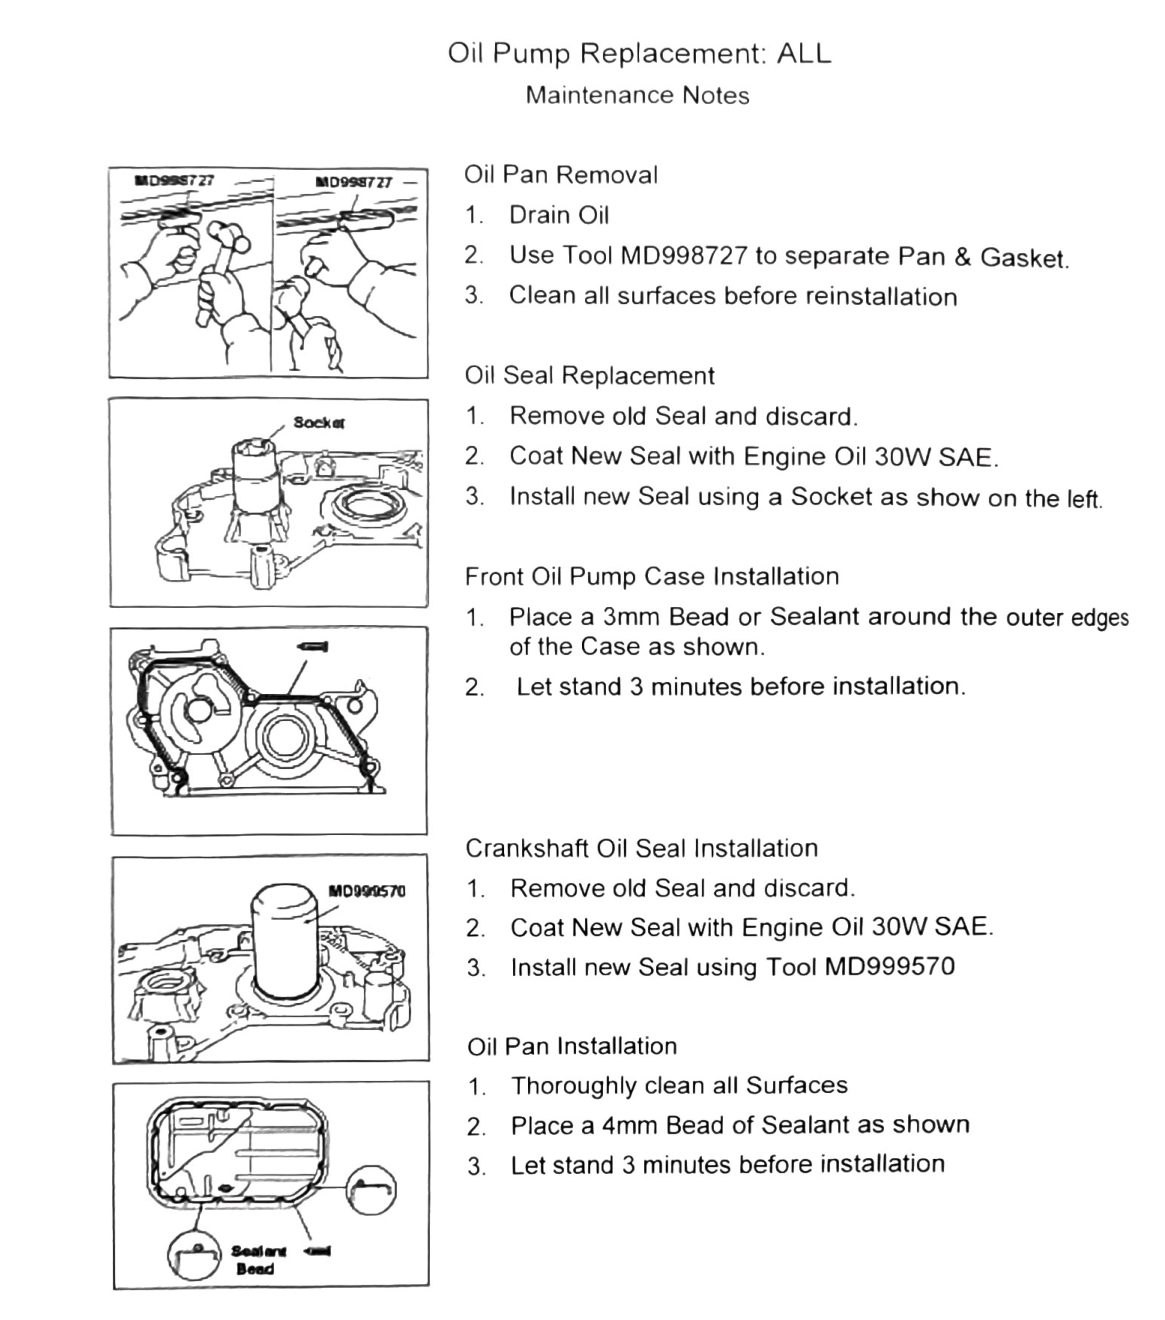
Maintenance notes
Oil pan removal
- Drain oil.
- Use tool MD998727 to separate pan & gasket.
- Clean all surfaces before reinstallation.
Oil seal replacement (general)
- Remove old seal (implied).
- Coat new seal with engine oil (30W SAE).
- Install new seal using a socket.
Front oil pump case installation
- Place a 3mm (0.118in) bead of sealant around the outer edges of the case as shown.
- Let stand 3 minutes before installation.
Crankshaft (front) oil seal installation
- Remove old seal and discard.
- Coat new seal with engine oil (30W SAE).
- Install new seal using tool MD999570.
Oil pan installation
- Thoroughly clean all surfaces.
- Place a 4mm (0.157in) bead of sealant as shown.
- Let stand 3 minutes before installation.
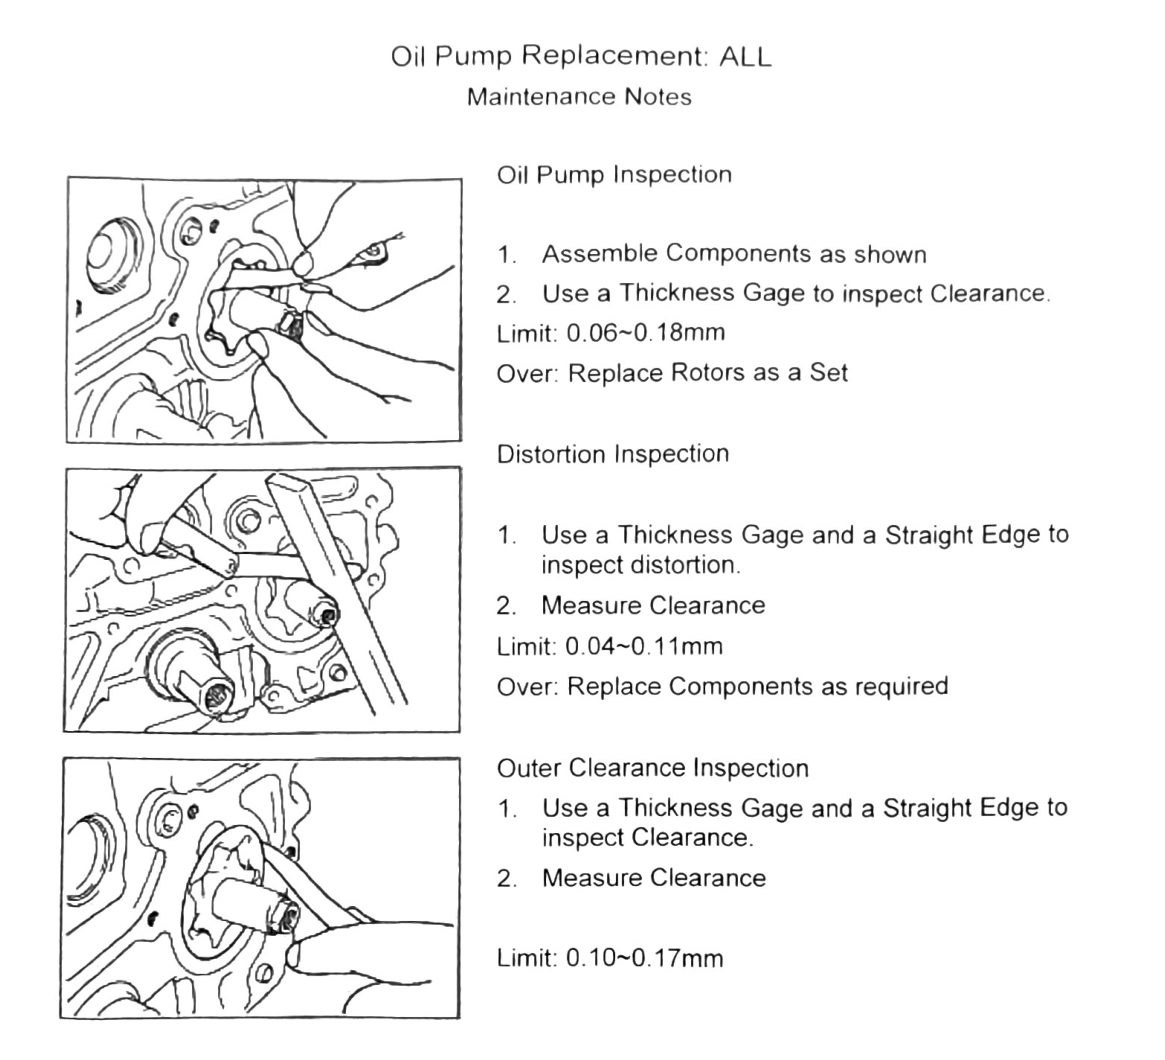
Oil pump inspection
| Inspection | Limit | Action |
|---|---|---|
| Rotor clearance (thickness gauge) | 0.06-0.18mm (0.002–0.007in) | Over: replace rotors as a set |
| Distortion (thickness gauge + straight edge) | 0.04-0.11mm (0.002–0.004in) | Over: replace components as required |
| Outer clearance (thickness gauge + straight edge) | 0.10-0.17mm (0.004–0.007in) | — |
These three limits match the Engine Specifications table (see 34-engine-specifications.md) for oil pump rotor clearance gap, side clearance, and body distortion respectively, confirming those readings.